Aseprite Extension
Image to Image
Transform an existing canvas while preserving structure.
What Is This?
Image to Image (img2img) takes your existing canvas as a starting point and transforms it according to your text prompts. Instead of generating from pure noise, the model first encodes your current image into a compressed internal representation (called latent space), adds a controlled amount of noise, and then denoises it back into a new image shaped by your prompt.
Use this tab when you want to:
- Repaint or restyle an existing sketch or pixel art.
- Apply a new art style while preserving the general layout and composition.
- Iterate on a previous generation by tweaking it rather than starting from scratch.
The key parameter that controls how much of the original image is preserved is Denoise %.
Quick Start
- Open or draw the sprite you want to transform in Aseprite — it becomes the input automatically.
- Choose a Base Model and optional LoRAs.
- Write a Positive Prompt describing what you want the result to look like.
- Set Denoise % to around
0.5–0.6to start. - Leave other KSampler settings at defaults.
- Click Generate.
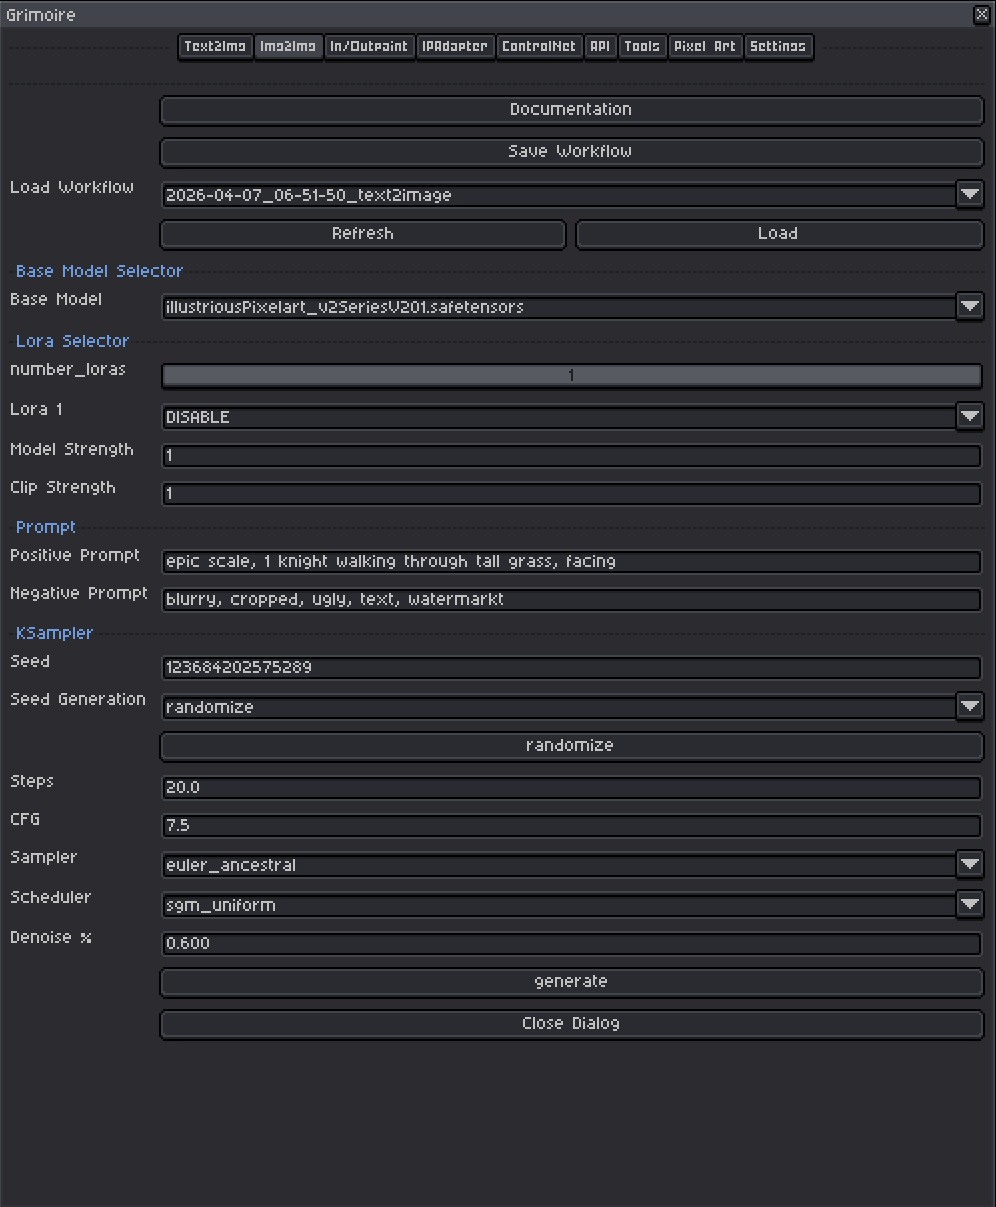
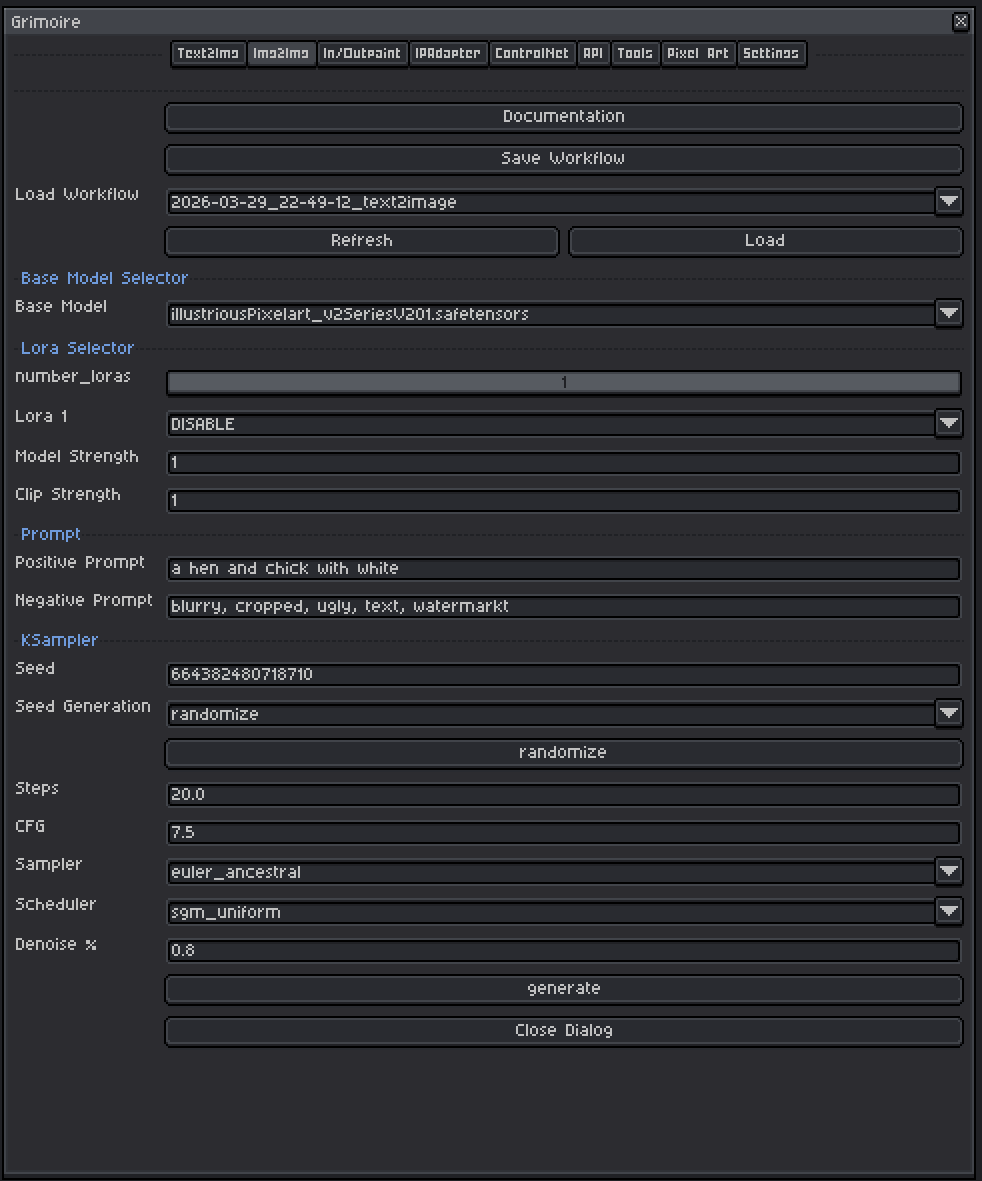
Base Model Selector
A checkpoint is a single file containing a complete, self-contained AI model — think of it as the artist behind your generations. Each checkpoint has been trained on a specific collection of images and has developed its own visual style as a result. One checkpoint might produce photorealistic results, another painterly oil paintings, another crisp pixel art. The checkpoint you pick has the single biggest impact on what your output looks like.
Tips:
- Models trained on pixel art (e.g.
pixel-art-xl,PixelArtDiffusion) produce pixel art output without extra effort in the prompt. - SDXL-based models generally produce higher resolution and more coherent results than SD 1.5 models but are slower and need more VRAM.
- The model name usually gives you a hint — look for keywords like
pixel,anime,realistic,cartoon, etc. - For img2img, the model should match the style you are targeting in your prompt. If you’re trying to convert a sketch to pixel art, use a pixel art checkpoint.
LoRA Selector
LoRAs (Low-Rank Adaptations) are small add-on files that nudge the model toward a specific style, character, concept, or technique without replacing the whole model.
Controls:
| Control | What It Does |
|---|---|
| Number of LoRAs slider | Shows 1–5 LoRA slots. Slots beyond the slider value are hidden and set to DISABLE. |
| LoRA dropdown | Pick which LoRA file to use. Set to DISABLE to skip that slot entirely. |
| Model Strength | Controls how strongly the LoRA pushes the visual output toward its style. At 0.0 the LoRA has no effect; at 1.0 it applies its full influence. |
| Clip Strength | Controls how much the LoRA changes what your prompt words mean to the model. For example, a pixel art LoRA with high Clip Strength might make the word “character” automatically invoke pixel art proportions and conventions even if you don’t write “pixel art” in your prompt. At lower values your words keep their normal meaning while the visual style still shifts. In almost all cases, set this to the same value as Model Strength. |
Recommended ranges:
- Model Strength:
0.5–1.0for most LoRAs. Start at0.8. Above1.0often causes over-saturation or artifacts. - Clip Strength: Match Model Strength as your default. Only lower it independently if the LoRA seems to be overriding or confusing your prompts in unexpected ways while the image style still looks correct.
- In img2img, LoRAs are useful for pushing toward a specific art style while the input image provides the structural composition. Consider using slightly lower LoRA strengths (
0.6–0.8) so the LoRA doesn’t overpower the input image’s structure.
Input Image
The active Aseprite sprite is automatically used as the input. There is no file picker — whatever is on your canvas right now is what the model will transform. The sprite is silently exported to the ComfyUI input folder when you click Generate.
Tips:
- Make sure you are viewing the frame/layer combination you want to use before generating.
- The input resolution matters. A very small sprite (e.g. 16×16) fed into a model expecting 512×512 will be upscaled internally, which can lose pixel art crispness. Consider working at a higher resolution and downscaling after generation, or use a pixel-art-specific model.
Prompts
Positive Prompt
Describe what you want the output to look like. The model uses your image for composition and structure, but the prompt steers the style, content, and details.
Tips:
- Lead with the most important concept (subject first, then style, then detail).
- Include style keywords:
pixel art,oil painting,watercolor,anime,photorealistic, etc. - Quality boosters for non-pixel models:
masterpiece, best quality, highly detailed. - Comma-separate concepts. Each comma acts as a natural emphasis boundary.
Example:
- Input: rough pencil sketch of a castle
- Prompt:
pixel art castle, stone walls, cloudy sky, top-down RPG style, 16-bit
Negative Prompt
Describe what you do not want in the image. The pre-filled default (blurry, cropped, ugly, text, watermark) is a reasonable starting point.
Common additions:
blurry, low quality, extra limbs, bad anatomy, deformed, watermark, signature, text, cropped, jpeg artifacts
Tips:
- Negative prompts prevent common failure modes. If your generations have a recurring problem (extra fingers, bad backgrounds, wrong style), add those words here.
- Don’t go overboard — an extremely long negative prompt can sometimes compete with your positive prompt.
KSampler Settings
The KSampler is the engine that runs the diffusion process. For img2img the most important setting is Denoise % which controls how much your original image is preserved versus rebuilt.
Seed
A number that initializes the noise pattern. The same seed + same settings = the same image every time.
| Mode | Behavior |
|---|---|
| fixed | The same seed is reused every generation (reproducible results) |
| increment | Seed goes up by 1 each time |
| decrement | Seed goes down by 1 each time |
| randomize | A new random seed is picked each time |
Tips:
- Use
randomizewhile exploring. Once you get a result you like, note the seed and switch tofixedto refine it without losing that result. - The seed button manually advances the seed without triggering a generation.
Steps
How many refinement passes the model takes.
| Range | Effect |
|---|---|
| 10–15 | Fast, rougher results — good for quick iteration |
| 20–30 | Recommended default. Good balance of quality and speed. |
| 40–50 | Slower, sometimes slightly sharper. Rarely necessary. |
Start at 20. With lower denoise values (0.3–0.5), the model performs fewer effective steps internally anyway, so 20 is usually sufficient.
CFG (Classifier-Free Guidance Scale)
Controls how strictly the model follows your prompt versus improvising freely.
| Value | Effect |
|---|---|
| 1–3 | Very loose — model largely ignores the prompt. |
| 5–7 | Recommended range. Balanced, natural-looking results. |
| 7–9 | Prompt-faithful but can over-saturate or over-sharpen. |
| 10+ | Very rigid — often produces plastic-looking images. |
Start at 7.0. With very low denoise values, you can sometimes use slightly higher CFG (8–9) to push the prompt harder without losing the original structure. If results look artificial, go down to 6–6.5.
Sampler
The mathematical algorithm used to run the diffusion steps.
| Sampler | Character |
|---|---|
| euler_ancestral | Fast, slightly painterly, good general purpose. Best starting point. |
| euler | Clean and deterministic. Less variation between generations. |
| dpmpp_2m | Efficient — often good quality at 20 steps. |
| dpmpp_sde | Stochastic. Can produce very detailed results, varies slightly even at fixed seed. |
| ddim | Deterministic, older algorithm. Fine for general use. |
Recommended default: euler_ancestral
Scheduler
Controls how the noise level changes across the steps.
| Scheduler | Character |
|---|---|
| normal | Safe general-purpose default. Start here. |
| karras | Often improves detail and softness. Pairs well with dpmpp samplers. |
| sgm_uniform | Good for SDXL models. |
| exponential | Aggressive early denoise. Can produce very clean results. |
Recommended default: normal. Try karras with dpmpp samplers for a quality bump.
Denoise % — The Most Important Img2Img Setting
Denoise controls the balance between preserving your original image and creating something new.
| Value | Effect |
|---|---|
| 0.0 | Zero change — output is identical to the input. Not useful. |
| 0.2–0.3 | Very subtle change. Minor color/texture shifts. Original structure almost fully intact. |
| 0.4–0.5 | Moderate transformation. Layout and composition preserved, details reworked. Good default for styling. |
| 0.5–0.7 | Significant transformation. General forms remain but details change substantially. |
| 0.7–0.9 | Heavy transformation. The original image becomes a loose suggestion. |
| 1.0 | Full regeneration from noise — equivalent to text-to-image. Original image ignored. |
Recommended starting point: 0.50
Practical guide:
- You want to preserve your pixel art and just recolor/restyle it → try
0.3–0.45 - You want to transform a sketch into pixel art → try
0.55–0.7 - You want to use your image as a loose composition guide only → try
0.75–0.85 - Results look too similar to input → increase denoise
- Results look nothing like input → decrease denoise
Workflow Tools (Top Bar)
| Tool | What It Does |
|---|---|
| Save Workflow | Saves the current settings to a named file for later reuse. |
| Load Workflow | Restores settings from a saved or history workflow. |
| Generate | Runs the generation and auto-saves to history. Seed updates per the Seed Generation mode. |
Tip: Save workflows when you find a combination you like. You can build a library of different styles and reload them instantly.
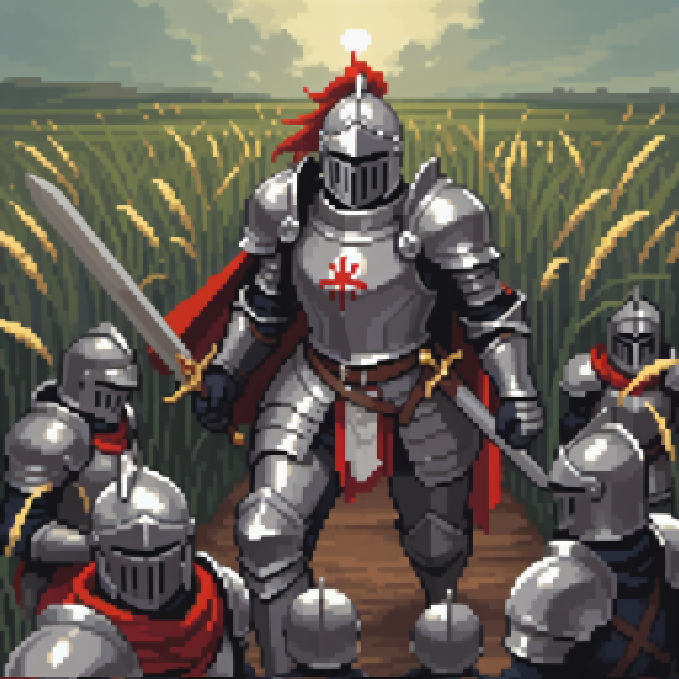
Example