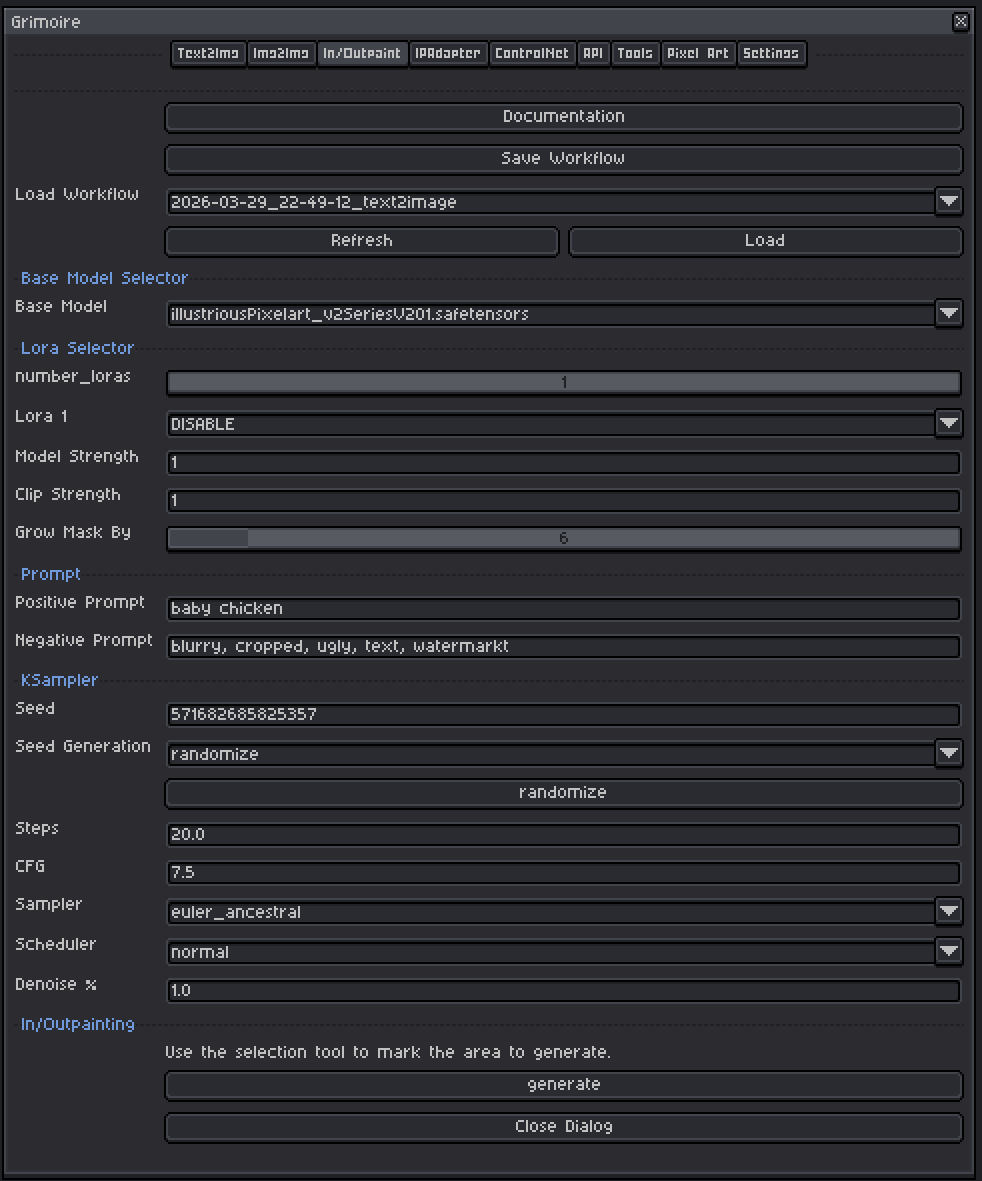
Aseprite Extension
Inpaint and Outpaint
Edit selected regions or extend a scene beyond the canvas.
What Is This?
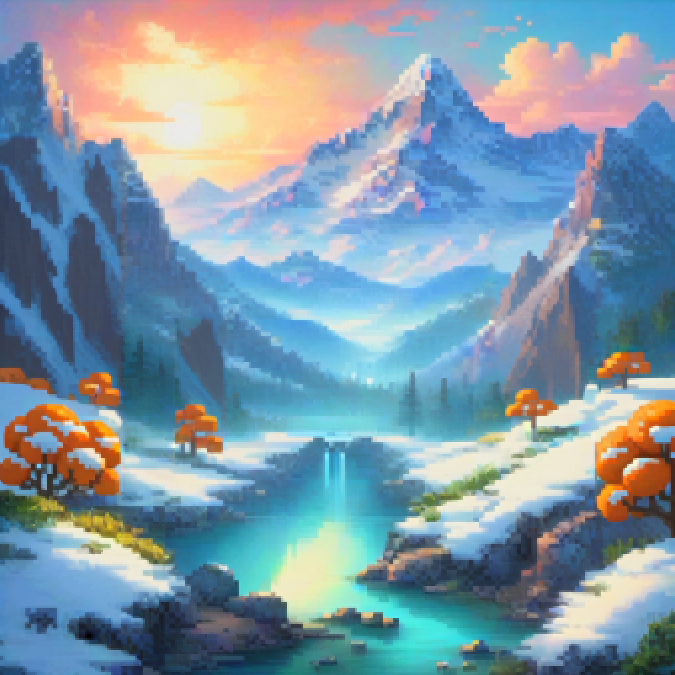
Inpainting lets you regenerate a specific region of your canvas while keeping everything else intact. You define the region using Aseprite’s selection tools, and the model fills it in based on your prompt and the surrounding context.
Outpainting uses the same mechanism in reverse — you expand the canvas and select the empty border area, letting the model generate new content that extends the existing image.
Use this tab when you want to:
- Fix a bad part of a generated image (bad face, wrong hand, awkward background element).
- Add new elements to an existing image.
- Extend an image beyond its current borders.
- Replace the background while keeping your character.
Quick Start
- In Aseprite, use any selection tool (Rectangle, Lasso, Magic Wand, etc.) to mark the area you want to regenerate.
- Choose a Base Model and optional LoRAs.
- Write a Positive Prompt describing what should appear in the selected area.
- Optionally adjust Grow Mask By to slightly expand the selection boundary.
- Set Denoise % to
0.75to start. - Click Generate.
How the Selection Works
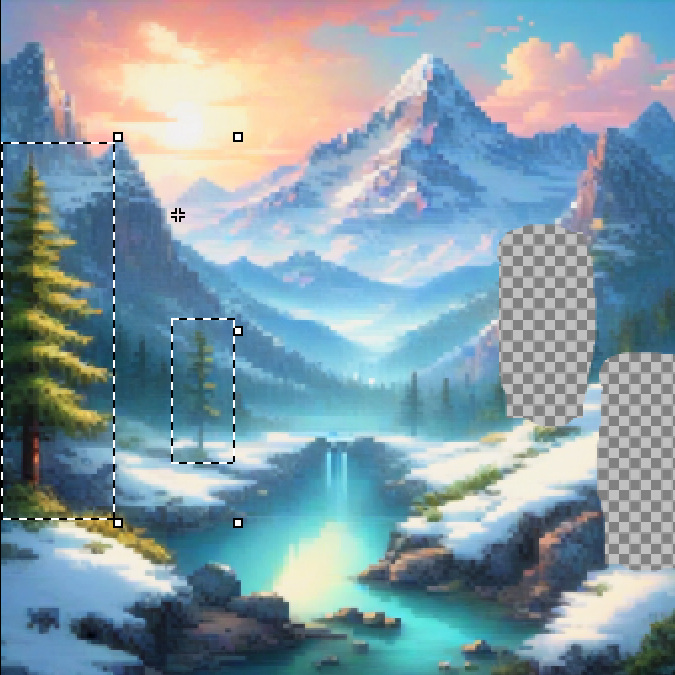
The Aseprite selection or area’s with an alpha of 0 are converted into a mask that tells the model which pixels to regenerate. Areas inside the selection are rebuilt. Areas outside the selection are preserved exactly.
The model also sees the surrounding unmasked pixels as context — this helps it blend the newly generated content naturally into the existing image.
Important: You must have an active selection before clicking Generate. If no selection exists, the plugin will warn you.
Base Model Selector
A checkpoint is a single file containing a complete, self-contained AI model — think of it as the artist behind your generations. Each checkpoint has been trained on a specific collection of images and has developed its own visual style as a result.
Tips:
- Use a model that matches the style of your existing image. If your sprite is pixel art, use a pixel art model — this helps the filled area blend naturally with the rest.
- Standard checkpoint models work for inpainting in most cases.
- Inpainting-specific models (e.g.
sd-v1-5-inpainting.ckpt) are trained specifically for this task and tend to blend edges more naturally. Use these when available. - SDXL-based models generally produce higher resolution and more coherent results than SD 1.5 models but are slower and need more VRAM.
LoRA Selector
LoRAs (Low-Rank Adaptations) are small add-on files that nudge the model toward a specific style, character, concept, or technique without replacing the whole model.
Controls:
| Control | What It Does |
|---|---|
| Number of LoRAs slider | Shows 1–5 LoRA slots. Slots beyond the slider value are hidden and set to DISABLE. |
| LoRA dropdown | Pick which LoRA file to use. Set to DISABLE to skip that slot entirely. |
| Model Strength | Controls how strongly the LoRA pushes the visual output toward its style. At 0.0 the LoRA has no effect; at 1.0 it applies its full influence. |
| Clip Strength | Controls how much the LoRA changes what your prompt words mean to the model. For example, a pixel art LoRA with high Clip Strength might make the word “character” automatically invoke pixel art proportions and conventions even if you don’t write “pixel art” in your prompt. At lower values your words keep their normal meaning while the visual style still shifts. In almost all cases, set this to the same value as Model Strength. |
Recommended ranges for inpainting:
- Model Strength: Keep at
0.6–0.8. Heavy LoRA influence during inpainting can fight with the need to blend into the existing image and cause visible seams. - Clip Strength: Match Model Strength as your default. Only lower it independently if the LoRA seems to be overriding or confusing your prompts in unexpected ways while the image style still looks correct.
- If the filled area looks stylistically different from the rest of your image, reduce both LoRA strengths.
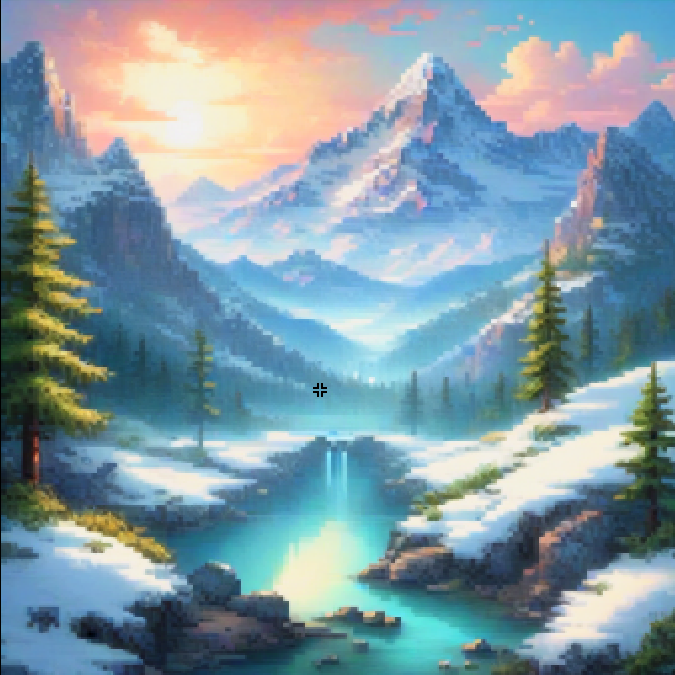
Input Image
The active Aseprite sprite is automatically used as the source image. The selected area becomes the inpaint mask. No file picker is needed — whatever is on your canvas is what the model sees.
Grow Mask By
Expands the selection mask outward by a set number of pixels before inpainting.
| Value | Effect |
|---|---|
| 0 | Mask exactly matches your selection — no expansion. |
| 4–8 | Recommended default. Softens the boundary slightly, helping the fill blend into the surroundings. |
| 16–32 | Larger expansion — useful if edges of your selection are in an area that needs reworking anyway. |
| 64 | Maximum — large overlap with surrounding content. |
Start at 6. If you see a hard seam or ring artifact around the filled area, increase this value to 8–12 to give the model more context at the boundary.
Prompts
Positive Prompt
Describe what you want to appear inside the selected region. Be specific about what belongs in that area.
Tips:
- Lead with the most important concept (subject first, then style, then detail).
- Include style keywords:
pixel art,oil painting,watercolor,anime,photorealistic, etc. - Quality boosters for non-pixel models:
masterpiece, best quality, highly detailed. - Comma-separate concepts. Each comma acts as a natural emphasis boundary.
- The model also uses the surrounding unmasked content as context and will try to match the general style already present. Mentioning the style explicitly in the prompt (e.g.
pixel art) reinforces this.
Examples:
- Fixing a face:
pixel art face, closed eyes, smiling, soft shading - Replacing background:
pixel art stone wall, torches, dark dungeon - Extending a sky:
blue sky, fluffy white clouds, bright sunny day, pixel art
Negative Prompt
Describe what you do not want in the image. The pre-filled default (blurry, cropped, ugly, text, watermark) is a reasonable starting point.
Common additions:
blurry, low quality, extra limbs, bad anatomy, deformed, watermark, signature, text, cropped, jpeg artifacts
Tips:
- Negative prompts prevent common failure modes. If your generations have a recurring problem, add those words here.
- Don’t go overboard — an extremely long negative prompt can sometimes compete with your positive prompt.
- For inpainting specifically, adding
seam, border, visible edge, mismatched stylecan help prevent blending issues between the filled area and the surrounding image.
KSampler Settings
The KSampler is the engine that runs the diffusion process. For inpainting, the most important setting is Denoise %.
Seed
A number that initializes the noise pattern. The same seed + same settings = the same fill every time.
| Mode | Behavior |
|---|---|
| fixed | The same seed is reused every generation (reproducible results) |
| increment | Seed goes up by 1 each time |
| decrement | Seed goes down by 1 each time |
| randomize | A new random seed is picked each time |
Tips:
- Use
randomizewhile trying to find a good fill. Once you get a result you like, note the seed and switch tofixedto refine it. - The seed button manually advances the seed without triggering a generation.
Steps
How many refinement passes the model takes.
| Range | Effect |
|---|---|
| 10–15 | Fast, rougher results — fine for quick iteration |
| 20–28 | Recommended range for inpainting. Slightly more steps helps blend the fill with the surrounding content. |
| 30–50 | Slower, marginal quality improvement. |
Start at 24. Inpainting benefits from a few more steps than a plain text-to-image run because the model needs to blend carefully with the preserved surrounding pixels.
CFG (Classifier-Free Guidance Scale)
Controls how strictly the model follows your prompt.
| Value | Effect |
|---|---|
| 1–3 | Very loose — model largely ignores the prompt. |
| 5–7 | Recommended range. Balanced, natural-looking results. |
| 7–9 | Prompt-faithful but can over-saturate colors or over-sharpen. |
| 10+ | Very rigid — often produces plastic-looking results. |
Start at 7.0. If the fill looks good but doesn’t match your prompt well, try increasing CFG to 8–9. If it looks artificially different from the rest of the image, reduce CFG to 5–6.
Sampler
The mathematical algorithm used to run the diffusion steps.
| Sampler | Character |
|---|---|
| euler_ancestral | Fast, slightly painterly, good general purpose. Best starting point. |
| euler | Clean and deterministic. Less variation between generations. |
| dpmpp_2m | Efficient — often good quality at 20 steps. |
| dpmpp_sde | Stochastic. Can produce very detailed results, varies slightly even at fixed seed. |
| ddim | Deterministic, older algorithm. Fine for general use. |
Recommended default: euler_ancestral
Scheduler
Controls how the noise level changes across the steps.
| Scheduler | Character |
|---|---|
| normal | Safe general-purpose default. Start here. |
| karras | Often improves detail and softness. Pairs well with dpmpp samplers. |
| sgm_uniform | Good for SDXL models. |
| exponential | Aggressive early denoise. Can produce very clean results. |
Recommended default: normal.
Denoise % — The Key Inpainting Setting
Controls how freely the model regenerates the selected region.
| Value | Effect |
|---|---|
| 0.4–0.5 | Light touch — the fill closely mirrors the pixel data that was there. Good for subtle fixes. |
| 0.6–0.8 | Recommended range. New content generated, but constrained by surrounding context. |
| 0.85–1.0 | Full regeneration of the selected area. Use when you want to completely replace the content. |
Recommended starting point: 0.75
Practical guide:
- The area looks almost right but needs minor tweaks → try
0.5–0.6 - You want completely new content in that spot → try
0.85–1.0 - The fill looks too disconnected from the rest of the image → lower denoise to
0.6–0.7 - The fill looks too similar to what was there before → raise denoise to
0.8–0.9
Outpainting
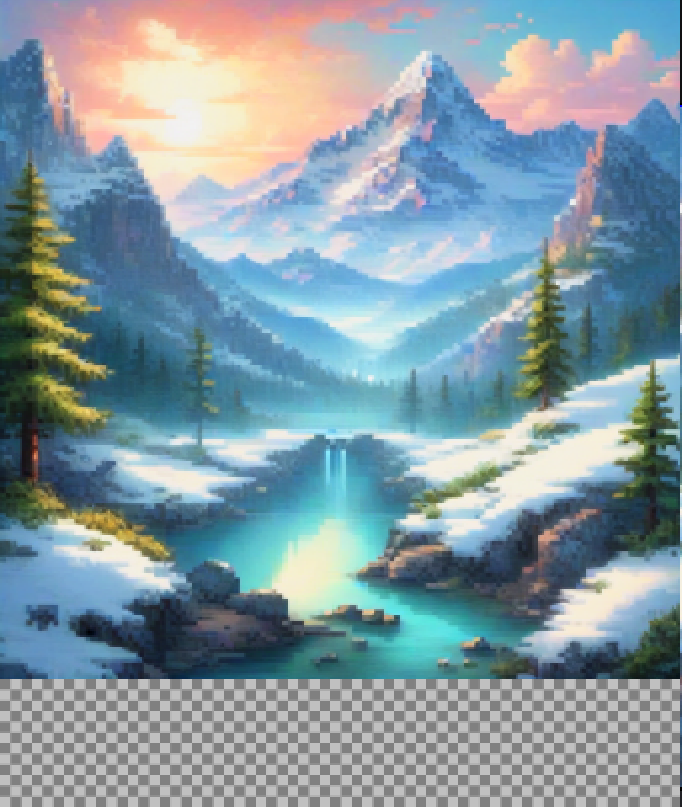
Outpainting extends your image into new areas using the same tab.
How to Outpaint
- Expand your Aseprite canvas (Canvas menu → Canvas Size). Add space in the direction you want to extend (e.g. add pixels to the right to extend rightward).
- The new empty border area is transparent.
- Select only the new empty area using a selection tool (Rectangle Select works well here).
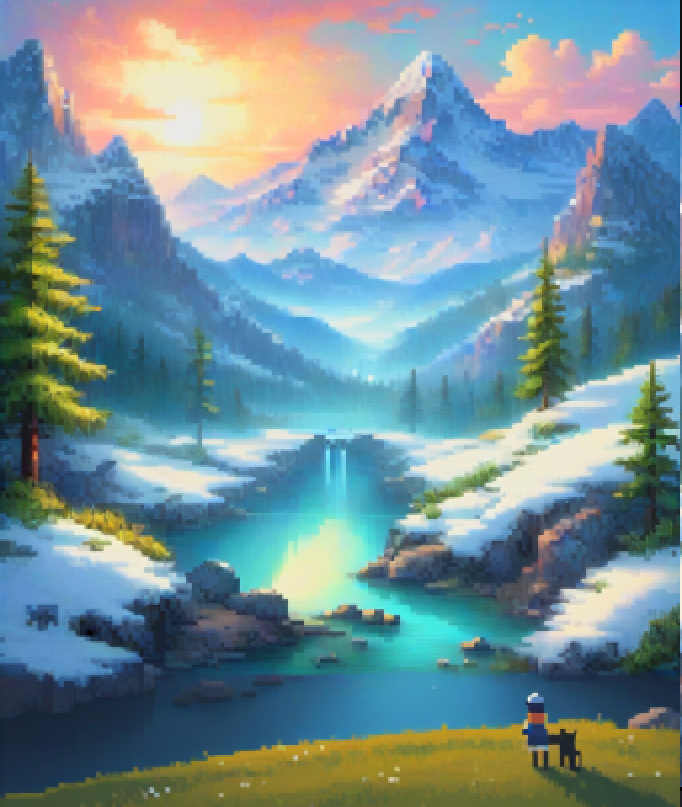
- Write a prompt describing what should appear in the extension:
more forest, continuing the trees, pixel art, same styleocean waves, continuing the beach scene, blue sky
- Use a moderate denoise (
0.75–0.9) to generate into the blank area. - Click Generate.
The model will see the existing content at the edges of your selection and try to continue it naturally into the blank space.
Tips:
- Include the existing image’s style explicitly in the prompt to help matching.
- Keep the selection slightly overlapping into the existing image (1–5 pixels) so the model has more edge context. Use Grow Mask By
4–8to handle this automatically. - Generate multiple times with different seeds and pick the best continuation.
Workflow Tools (Top Bar)
| Tool | What It Does |
|---|---|
| Save Workflow | Saves current settings to a named file for later reuse. |
| Load Workflow | Restores settings from a saved or history workflow. |
| Generate | Runs the generation and auto-saves to history. Seed updates per the Seed Generation mode. |
Tip: Save workflows when you find a combination you like. You can build a library of different styles and reload them instantly.